
Moogly
Creating Beautiful Things in Life: Search results for size chart

Search This Blog

Showing posts sorted by relevance for query size chart. Sort by date Show all posts

Thursday, January 17, 2013

How to properly size crochet hats. Chart for correct sizing, including Magic Circle Sizes.


Crocheting hats is something I know well. In my experience, getting the hat to fit properly without a model is not always easy. Most Beanies start of with a flat circle. The size of the circle depends upon the circumference of the head. Looking on the Internet I have found several Blogs that offered a chart   
to help in getting the proper size. The measurements for the circumference of the head and the corresponding sizing for the flat circle and hat height varied somewhat. Purchasing patterns can add to the frustration. I have had great differences for the same size between different designers.

To take the mystery out of fitting my hats, I started to keep a chart for the sizes I made the most. This was very helpful. I also did a lot of research into how to correctly size your flat circle and height of the hat. I found a formula that helps in getting the correct size. To figure out the diameter of your flat circle all you need to know is the circumference of the head. An adult woman's head averages about 22 inches. The formula is to divide your circumference by 3.14.

Head circumference 22 : 3.14 = 7.00 inches. Now you know your circle needs to be 7 inches. To get the correct height (from top of crown to bottom of the ear) you divide your circumference by 10 and multiply this number times 4.
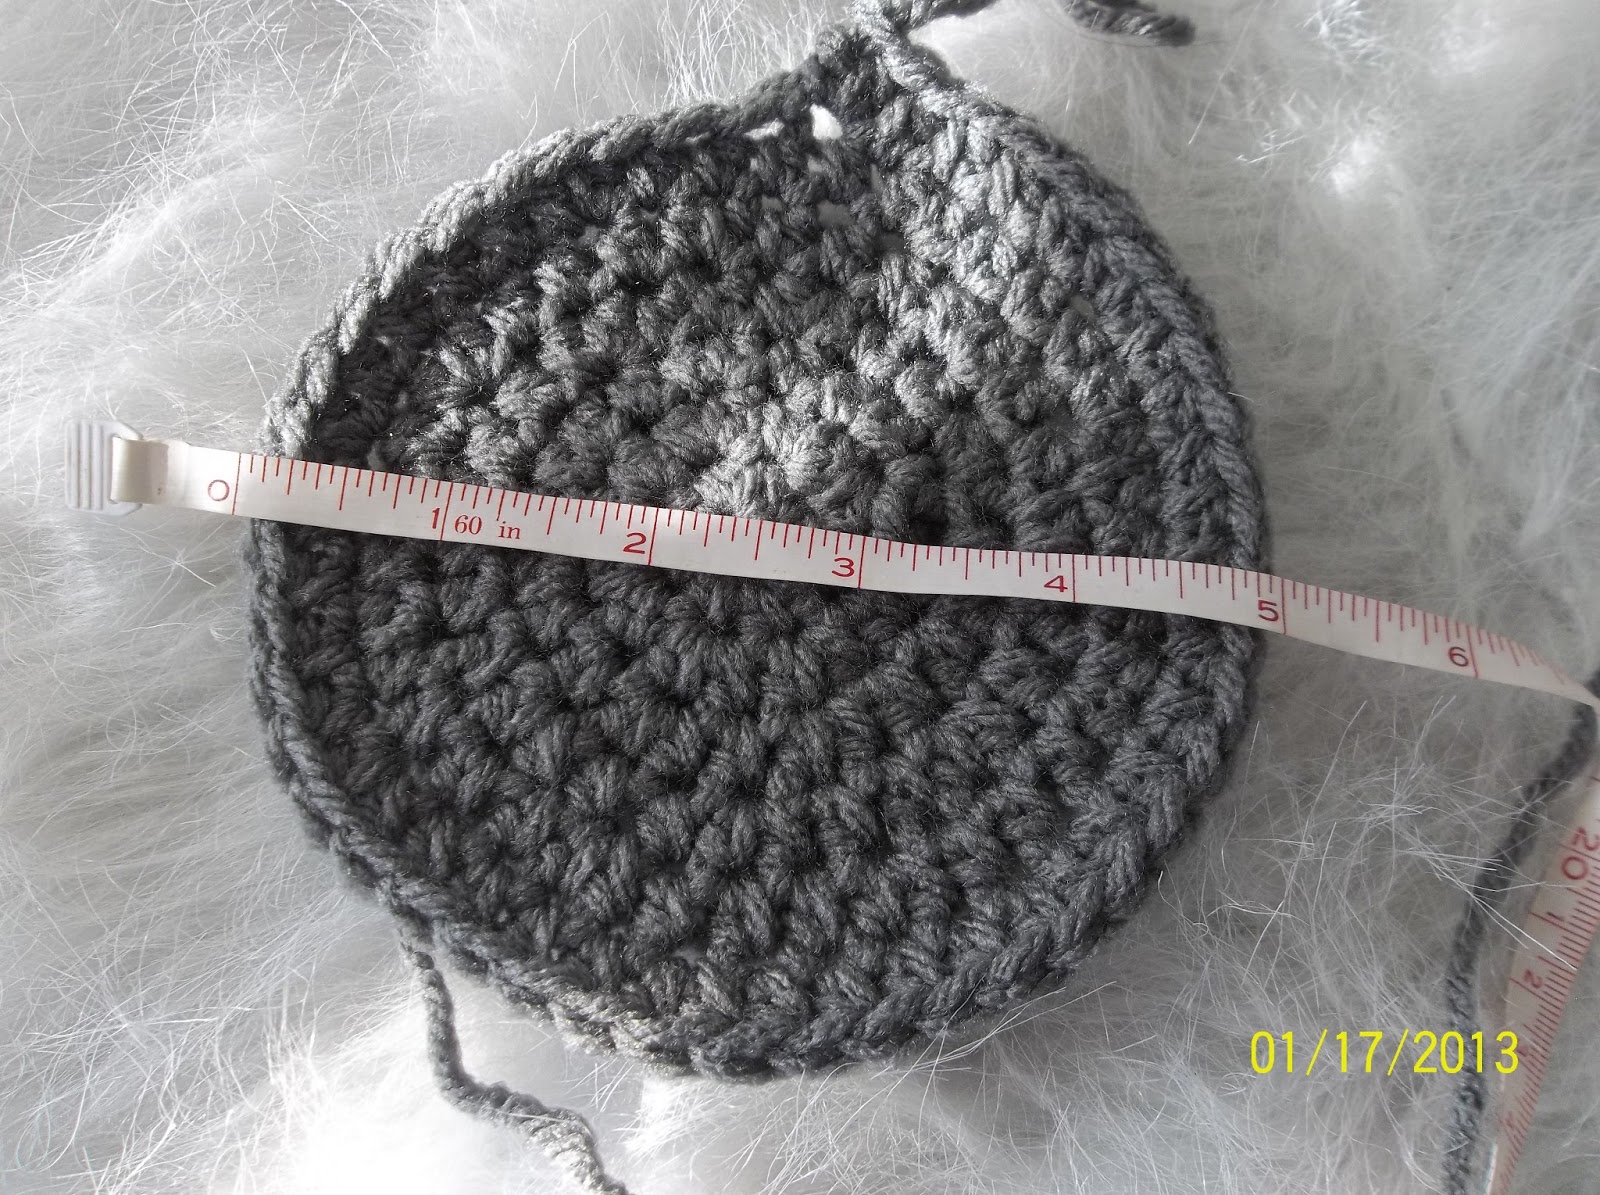


Head circumference 22 : 10 = 2.2 x 4 = 8.8. So the hat height should be 8.8 inches. Hats are generally made about an inch smaller in circumference than the circumference of the head. This keeps the hat fitting snug and to keeps it from falling off. Most patterns generally have about an inch stretch to them. 

I am going to post the chart I made for myself. This is the chart I use to size the hats I make. It is a good reference and I hope it helps.  


Size Head Circumference Hat Circumference Crown Circle Diameter Hat Height -Top of Crown to Bottom of Ear
Preemie 1 – 2 pounds 9 – 10 inches/23 – 25 cm 7.5 – 8 inches/18 – 20 cm 1.75 – 2 inches/4 ½ – 5 cm 3 – 3.5 inches/ 8 – 9 1/2 cm
Preemie 2 – 3 pounds 10 – 11 ¼ inches/25 – 28 cm 8 1/2 – 10 inches/22 – 25 cm 2.0 – 2.25 inches/5 cm 3.5 inches/9 – 9 ½ cm
Preemie 4 – 5 pounds 11 ½ – 12 inches/28 – 30 cm 9 – 10 inches/23 – 25 cm 2.5 – 3 inches/ 6 ½ – 8 cm 3.5 – 4 inches/9 – 10 ½ cm
Preemie 5 ½ – 6 pounds 12 – 13 inches/30 – 33 cm 10 - 11 inches/25 – 28 cm 3.0 – 3.5 inches/7 ½ – 9 cm 4 – 4.5 inches/10 ½ – 11 ½ cm
Newborn 13 inches/33 cm 12 – 12.5 inches/30.5 – 32 cm 3.5 – 4.0 inches/9 – 10 ½ cm 4.5 – 5.5 inches/11 ½ – 14 cm
2 weeks – 3 months 14 inches/35.5 cm 13 – 13.5 inches/33 – 34.5 cm 4.45 – 4.75 inches/11-12.5 cm 5.5 – 6 inches/14 – 15 ½ cm
3 – 6 months 15 inches/36 cm 14 – 14.5 inches/35.5 – 37 cm 5 inches/ 13 cm 6 – 6.25 inches/15 ½ – 16 cm
6 – 9 months 16 inches/40.5 cm 15 inches/36 cm 5.25 inches/14 cm 6.25 – 6.5 inches/16 – 16 ½ cm
9 -12 months 16.5 inches/42 cm 15.5 inches/ 39.5 cm 5.25 – 5.5 inches/14 – 15 cm 6.5 inches/16 ½ cm
12-18 months 17 inches/43.5 cm 16 inches/ 40.5 cm 5.5 - 5.75 inches/15 cm 6.75 inches/ 17 ½ cm
18-24 months 18 inches/46 cm 17 inches/ 43.5 cm 5.75 – 6 inches/15 – 16 cm 7.25 inches/19 cm
2-5 years 18 – 19 inches/46 – 48.5 cm 17 – 18 inches/43.5 – 46 cm 6 – 6.25/16 cm 7.25 – 7.5 inches/ 19 cm
Child 19 – 20 inches/48.5 – 51 cm 18 – 19 inches/46 – 48.5 cm 6.25 – 6.5 inches/16 cm – 17 cm 7.75 – 8.0 inches/20 cm
Teen 20 – 21 inches/51 – 53.5 cm 19 – 20 inches/48.5 – 51 cm 6.5 – 6.75 inches/17 8.0 – 8.5 inches/20 – 22 cm
Adult Woman 22 inches/56 cm 21 inches/53.5 cm 7 – 7.5 inches/18 – 19 cm 8.75 – 9 inches/23 cm
Adult Man 23 inches/ 59 cm 22 inches/56 cm 7.5 - 8 inches/19 – 20 cm 9.25 – 9.50/23 ½ cm

My next post will show this formula in action. I have already completed the hat and taken some photos but still need to write the post. Stay tuned and have those crochet hooks ready! See you in a couple of days.

How to Crochet a Properly Sized Hat


Most basic Beanies or hats start of with a flat circle. The diameter of the circle determines the circumference
of the finished hat. The diameter of the circle is determined by the circumference of the head. In my previous post, I included a chart for the various sizes.

I crochet a hat to show you how to properly size a hat. I made mine to fit an infant 3 - 6 months. At this age the average infants head is a circumference of about 15 inches. My flat circle needs to be 5 inches.


If you are not a very experienced crocheter, getting a flat circle may sound a little intimidating but it is actually very simple. The formula I use depends a the stitch. If I crochet in a single crochet stitch I start with a circle of 6 stitches and evenly increase 6 stitches with every round. For half double crochet I start with 8 stitches and evenly increase 8 with every following round. For a circle with double crochet I start with 12 and increase 12 with every round. The yarn and hook size do make a difference. Worsted weight yarn can vary greatly size. With the thicker yarns, fewer increase rounds are needed. I do not join at the end of the row but I do use a stitch marker to mark the first stitch of every round on my increase rounds only. It gives a much neater finish without a seam showing.

The pattern I use is always the same. For instance if I work my circle with sc, rd. 1 would be 6. For round 2   I would have 2 stitches in every stitch of the previous round (12). Round 3: 1 sc in first stitch, 2 sc in next stitch, 1 sc in in next stitch, 2 sc in next stitch...(18). Rd 4: 1 sc in the first 2 stitches than 2 sc in the 3rd stitch continue in this pattern for the round (24).  Round 4: sc in first 3 stitches, 2 sc in next. sc in nex 3 stitches, 2 sc in next...(30). Continue in this pattern until desired diameter is reached.

Once you have the correct diameter of the circle continue without further increases until your hat measures the correct height. Since I am working on a 3 - 6 months size, my hat should be about 6 inches in height.


When measuring the final circumference I had exactly 14 inches. Since the hat needs to be about an inch smaller than the circumference of the head, I was right on the mark. At this point you can add a small border around the edges for a Beanie, or add ear flaps.  To show the proper positioning of the ear flaps I included a few more photos.


Ear flaps are always attached to the back half of the hat. The corners of the ear flaps meeting with the corners of your hat. Notice the small space between the ear flaps in the back. I could have made them a little bit smaller for this size. Once you have one ear flap finished, simply fold the hat in half with the corner of the ear flap meeting with the corner of the fold. Insert crochet hook in the opposite corner and work the same number of stitches to the back half of the hat.

Once your ear flaps are done, finish the hat with a trim. I usually go all the way around with one round or two
of single crochets. I forgot to take a picture of the finished hat but I have one with a model. You have to forgive the fit. My doll only measures about 12 inches in diameter so the hat is about 3 sizes to big. But it does give you an idea of the correct placement of the ear flaps.


Leave me a message or a comment if you need help with any of your projects. My next post will follow very soon. Finishing touches for your hats. How to make Pom Poms and braids. Also since Valentines day is less than a month away, I am trying to put some of my crochet heart patterns in writing. I will share them with you as soon as I can get them on paper. Stay tooned!


Friday, August 3, 2012

How to Crochet - Finishing Off, Reading a Pattern and Crochet Abbreviations (Tutorial)


Learn to Crochet - Finishing

Finishing methods for crochet depend largely on the end purpose of the crochet (pillow, afghan, garment) and the yarn you use to create the piece.

Learn to Crochet - Crochet Diagrams

Diagrams are read exactly as the crochet is worked. Each stitch is represented by a symbol that has been drawn to resemble its crocheted equivalent. The position of the symbol shows where the stitch should be placed and worked.
Stitch symbols are drawn and laid out as realistically as possible, but there are times when they have to be distorted for the sake of clarity. For example, stitches may look extra long to show clearly where they are to be placed, but you should not try to match the chart by making elongated stitches. Crochet each stitch as you normally would.

n order to follow crochet instructions, you should know how to make the basic stitches and be familiar with basic procedures for making crochet fabric. You should also be familiar with the abbreviations for basic crochet stitches.
The pattern will list the materials necessary for the project, including the size of the crochet hook used to meet the designer's gauge. Gauge refers to the number of stitches and rows in a given area. When following a pattern for a garment or other article, the instructions will include a specified gauge. If you do not crochet fabric with the same number of stitches and rows as indicated, your work will not be the same size as the measurements given. To ensure that you achieve the correct gauge, work a large sample or swatch before starting to crochet the actual project. The hook size stated in the pattern is a suggested hook size only. You must use whichever hook gives you the correct gauge. If you have fewer stitches and rows than the specified gauge, you are working too loosely and need to try a smaller crochet hook. If you have more stitches and rows than the specified gauge, you are working too tightly and need to try a larger crochet hook. If you cannot meet gauge by changing hook sizes, sometimes changing hook types (bamboo, wood, aluminum, plastic) may help.
In the written instructions, the stitches that should be repeated are contained within brackets [ ] or follow an asterisk *. These stitches are repeated across the row or round the required number of times. On chartedcrochet diagrams, the stitches that have to be repeated can be easily visualized. The extra stitches not included in the pattern repeat are there to balance the row or make it symmetrical and are only worked once. Turning chains are only worked at the beginning of each row.
If you are confused by a particular set of instructions, you may find it helpful to write out the instructions without abbreviations, writing out each individual pattern repeat. You may also find it helpful to use a repositionable note to cover the instructions above and below the step you are working on so that your eye doesn't stray and pick up with another set of similar instructions in a different step of the pattern.

Abbreviations
beg  …. begin(ning)
bet …. between
blk …. block
CA, CB, CC, etc …. Color A, Color B, Color C, etc.
ch(s) …. chain(s)
cm …. centimeter(s)
dec ….. decrease
dc  …. double crochet
dtr …. double treble
hdc ….  half double crochet
inc …. increase
lp(s) ….loop(s)
mm …. millimeter(s)
rep …. repeat
rnd(s) …. round(s)
RS …. right side
sc …. single crochet
sk …. skip
sl …. slip
sp(s)
 …. space(s)
st …. stitch(es)
tog …. together
tr …. treble
WS …. wrong side
yo …. yarn over* or ** … repeat whatever follows the * or ** as indicated
[ ] …. work directions in brackets the number of times indicated