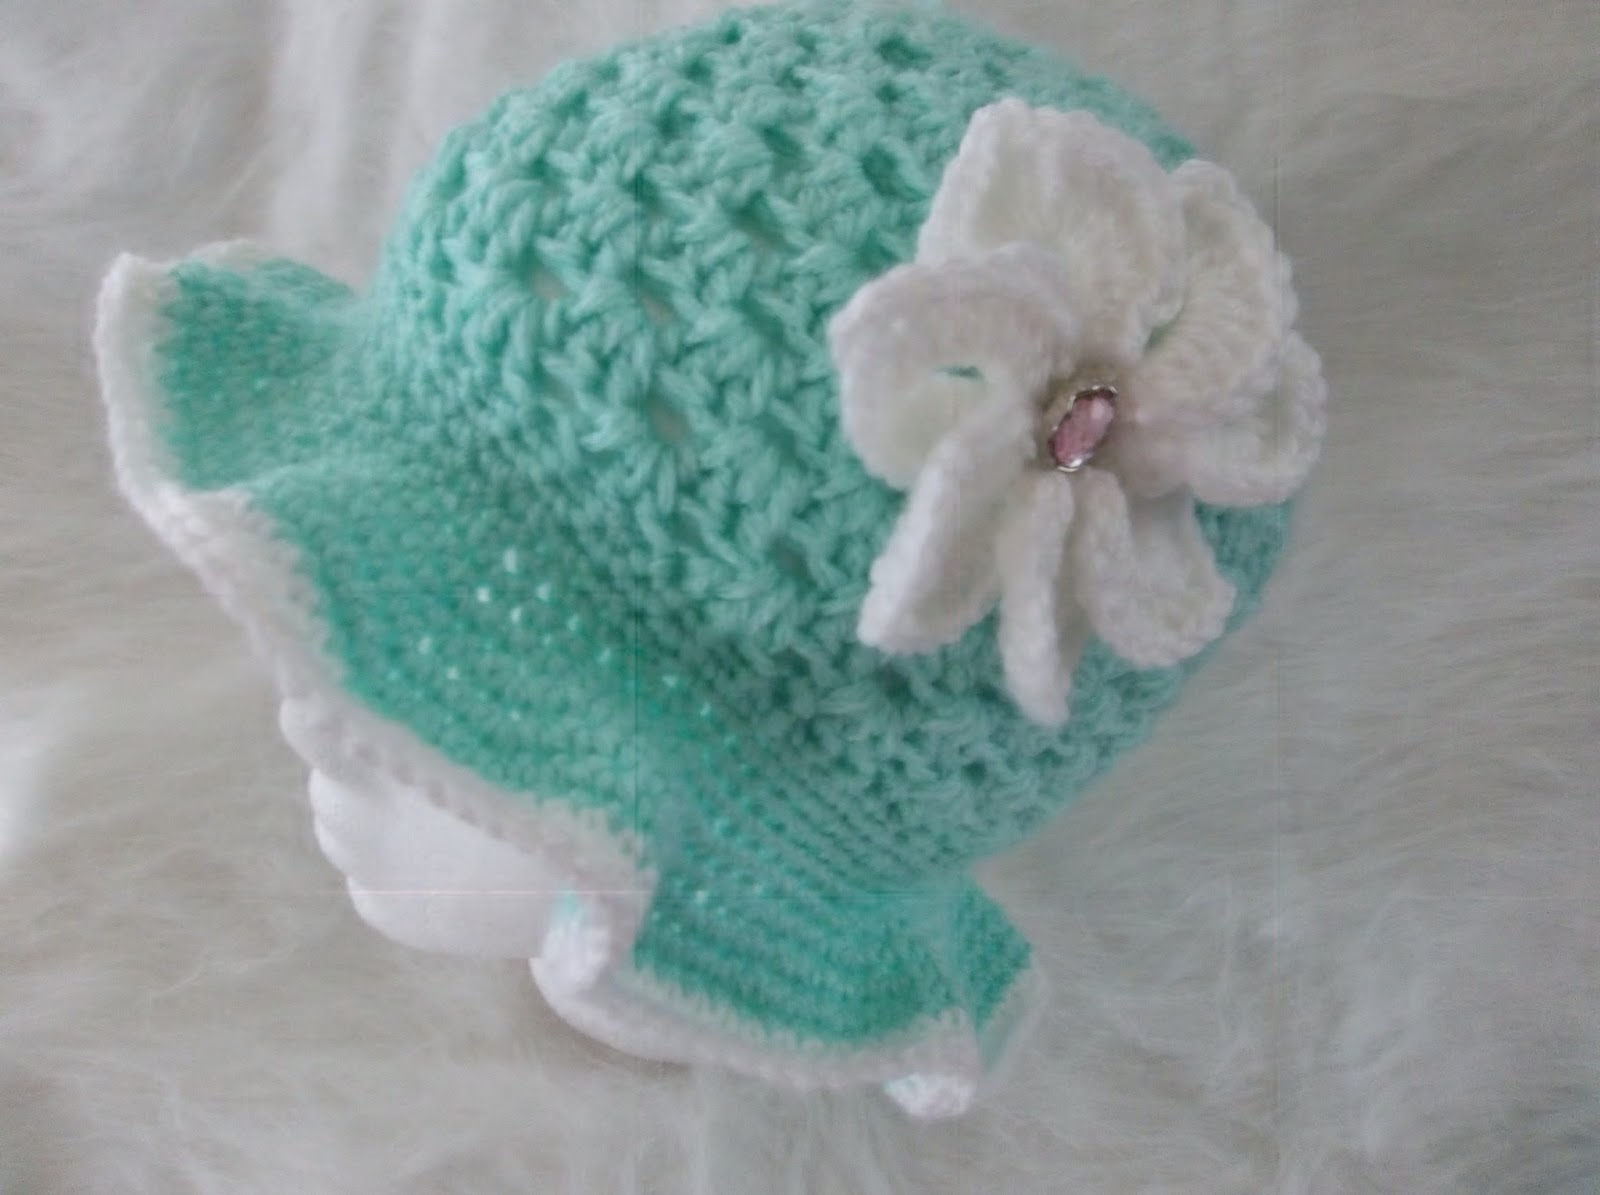
According to the Groundhog, winter is almost over. I for one, am ready for spring. When I was organizing my stash of yarn, I found a few skeins in pretty pastel colors. Just what I needed to deal with the winter blahs. Since I had just purchased a few more skeins of white, I decided to make some pretty hats for spring.
Less than a couple of hours later, the first one was finished.
These hats are very easy to make. If you know how to work a simple Granny Square and you can single crochet, making this hat is a breeze. How do you turn a square into a round? All you need to do is to offset your corners. I work my corners into the space right after the last corner of the previous rows. This is only done on increase rounds. Once you have the desired size of your circle, the body of the hat is worked, without any corners.
Since the body of this hat is worked in double crochets witch are taller stitches, you may need to experiment with different sizes of you hooks or using thinner or thicker yarns to get the size you need. I used Caron One Pound Baby and a size I hook. It is a worsted weight yarn. Since I crochet fairly tight, I usually go up one size in hooks, than is recommended for the yarn. If you crochet loose, you may want to use a slightly smaller hook.
If you like your brim to have a more ruffled look, simply increase the number of stitches in the beginning of the brim. To keep it flat, make fewer increases and work more single crochet rounds, without adding any extra stitches between your increase rounds. Experiment and in no time you can design your own hats without having to use a pattern.
The size of hat I wrote the pattern for, should fit a teen/small woman. It took 6 increase rounds. To work this for a toddler, you would only need 5 increase rounds. For teens and adults, add 1 or to increase or corner rounds to get the size you need.

Body of the hat
With Magic Circle or chain 5 slip stitch to first chain to form a circle.
Rd 1: Chain 3, 2 dc, ch 1, 3 dc - first cluster made, (ch 1, 3 dc, ch 1) repeat 3 more times. Slip stitch to the top of ch 3. 12 dc and 4 ch spaces.
Rd 2: Slip stitch over next 2 dc and into first chain 1 space. ch 3, 2 dc, ch 1, 3 dc (first corner made). 3 dc, ch 1, 3 dc in next 3 ch spaces. Slip stitch in top of beginning ch 3. 24 dc and 4 ch spaces.
Rd 3: Slip stitch next 2 dc and into next ch space. Chain 2, 2 dc in ch space, * in space before next 3 dc group work corner (3 dc, ch 1, 3 dc), in next space 3 dc*, repeat *-* 3 times, slip stitch to top of chain. 36 dc and 4 chain 1 spaces
Rd 4: Slip stitch into first space, ch 2. 2 dc into first space, 3 dc in next space (corner space of previous rd.), 3 dc, chain 1, 3 dc in next space. 2 dc in each of the next 2 spaces, work corner into next space. Repeat till end of rd. slip stitch. 48 dc and 4 chain 1 spaces.
Rd:5 slip stitch into first space. Ch 2, 2 dc, ch 1, 2 dc in same space, work 3 dc in next space, 3 dc in next space, 3 dc in next space, 3 dc, ch 1, 3 dc in next space. Repeat to end of rd. 60 dc 4 chain spaces
Rd 6: slip stitch into first space, ch 2, 2 dc, ch 1, 2 dc in same space. If you are still increasing your circle, work pattern as before. 3 dc groups in spaces and corner (3 dc, ch 1, 3 dc) in spaces following corner of the previous round. Once desired circle diameter is reached, work rounds with groups of 3 dc only. No chain spaces between groups.
To get a child sized hat I had to do 5 increase rounds and my flat circle measured 6 inches. For size teen or small woman I needed to do 6 increase rounds. If you are having a hard time getting the circle measurement you need, go up or down a size in hooks, or skip 2 corners on the last increase rd. Working the pattern -make corner, skip next corner, make corner, skip last corner. This way you are only gaining 6 stitches instead of 12.
For Teen/Small woman I needed to do 16 rounds total. Since I am adding a large brim the measurement of my hat was 7 inches deep. Shorter than I would have done for a beanie.
Brim: I worked 6 increase rounds for a total of 72 stitches for the body of the hat. The brim is worked in single crochets and increases throughout the rounds of the brim. The pattern I use is to gradually increase the number of stitches in my rounds.
Rd: 1 single crochet in each stitch around. Mark last stitch since you are now working in continues rounds.
Rd 2: Sc first 8, 2 sc in next stitch, repeat through end of rd. 80 sc
Rd 3: Sc first 7, 2 sc in next stitch, sc next 8, 2 sc in next, sc next 8, 2 sc in next, repeat increasing every 9th stitch) till end of rd. 89 sc.
Rd 4: Sc first 8, 2 sc in next, sc in next 7, 2 sc in next, sc in next 7, repeat increasing every 8th stitch, till end of rd. 100 sc
Rd 5: sc in every stitch 100 sc
Rd 6: sc first 8, 2 sc in next, sc in next 6, 2 sc in next, sc in next 6 sc, 2 sc in next. repeat increase every 7th sc, in last repeat you should have 8 stitches work increase in last. 114 sc
Rd 7: increase every 6th stitch 133 sc
Rd 8: increase every 6th stitch, last repeat work repeat into last (7th) sc. 155 sc
Rd 9: sc in every stitch across 155 sc
Rd: 10: work increase in every 5th stitch 186 sc
Rd: 11: work increase every 5th stitch last increase 6th stitch 223 sc
Rd 12: work increase every 4th stitch, last increase in 3rd 278 sc.
Rd: 13 sc in every stitch 278 sc
Rd: 14: work increase every 3rd stitch, last increase in 2nd stitch 370 sc
Rd: 15 and 16, sc in every stitch.
Add border of your choice. I like using a simple scallop border for my hats. The pattern is very simple. Single crochet into first stitch, Chain 2, double crochet into same stitch as single crochet, skip 2 stitches, single crochet into 3rd stitch, chain 2 double crochet into single crochet, repeat until end of rd. slip stitch into first double crochet.
If you used fewer or more increase rounds on the body of the hat, the pattern for increasing rounds in your brim is much the same. The sc makes for a dense and stiff brim. Work your increases as close as possible to the increases of the previous rounds. By keeping the increases close together, it creates a wave. If you like a more ruffled look, start by increasing rd 2 every 3rd sc instead of every 9th. Work sc rounds for most of the rest of the brim. If you gain or loose a stitch in any rd of this brim, it's no big deal. No need to find the mistake and re-do. I don't use a pattern, I simply work by feel. This is just to give you an idea of how to do it.
Flowers: Pattern for flower in first photo I found at: http://bonitapatterns.tumblr.com/post/22424919278/here-goes-a-free-pattern-for-a-croco-flower-its
Flower for last (pink hat) Free Irish Rose pattern http://www.maggiescrochet.com/free-patterns-c-33.html?zenid=8df875fcc51ad47258b6540e47134139
Flower for Peach hat is a simple 3 layered flower. Pattern is easy to find, I crochet it without a pattern.
Be creative, have fun. Decorate your hat with your favorite flower or accessory. If you have any problems working this pattern or find any mistakes, please let me know. I will be glad to help you along as much as I can.
Please don't copy and redistribute this pattern or my photos as your own.