Moogly
Creating Beautiful Things in Life: Crochet

Search This Blog

Showing posts with label Crochet. Show all posts

Thursday, March 21, 2013

Lightening Race Car Crochet Wall Plaque


Hello, nice to see you again. If this is your first visit to my Blog, I hope you enjoy it and like what you see.
I have four granddaughters and 2 grandsons and I enjoy making nice things for all of them. I can find lots and lots of pretty patterns for the girls but the selections for boys is more limited. Boys deserve equal attention. Don't you agree? It took me less than a day to make this plaque. Considering I had to create the pattern as well, it came together very fast. Assuming you know the basic crochet stitches, this should be an easy project to complete.
I try to make some improvements with each new post. My goal with this post was to give you the instructions in PDF format. As I was trying to upload, using the PDF feature, I found out that this feature is not available with Blogger. After doing a little research, I found another way to include this feature in my post. I am a bit literate when it comes to HTML and was hoping to create a clickable link. However, in the post previous, it shows the document in its entirety. Since I have not tried this method before, I hope it is still an improvement over the cut and paste method, you had to use before. Please let me know how this works for you. Feedback is always welcome and greatly appreciated.

When writing up the pattern for this, I forgot to include a few photos and descriptions of the Embroidery stitches I used. If you have any questions please refer back to this Blog.

Embroidery stitches used: French Knot - http://www.youtube.com/watch?v=ytiI5nhV2HM
How to make a Back Stitch - http://www.wikihow.com/Backstitch

When instruction direct to sc down side of the windshield, sc evenly down side and all around outline of the car.

Back view of tire after attaching it to the car. 

Front view for placement of tires


Trace the outline of the project to a stiff piece of cardboard or foam board.


I cut away an additional 1/8 of an inch from the template. This is a back view of my plaque after gluing the front to the board 

My finished plaque. Hoping my grandson will love this as much as I loved making it for him.


Thursday, March 7, 2013

Cottontail Bunny, Easter Beanie and Diaper Cover

Where has time gone? Didn't realize until yesterday that Easter is just around the corner. I normally associate this holiday with spring. Winter decided to get a late start this year and we still have a lot of snow on the ground. Feels like it's still January rather than March. When I was working on the Don't eat the Daisy's Diaper set, I also did another cute little set for Easter. I love crocheting those little tiny baby items. This set uses the same pattern for the diaper cover but the beanie is worked in half double crochets. This will make it easier to embroider or to add appliques. Hope you enjoy this pattern as well.


]


Bunny Beanie Pattern

Size - Newborn 14 inch diameter and 5 1/2 inches deep. 

Supplies: MC 3/4 skein of Worsted weight yarn (I used Hobby Lobby's I love this yarn in Iced Aqua and small amounts of White and Pink for the ears). CC  1/2 skein of Bernat Pipsqueak in white for the trim of the diaper cover, beanie and ears. Very small amount of black embroidery thread for eyes and mouth.(You can also separate worsted weight yarn into 2 strands.)

Size J - 5.50 mm Crochet hook for body of beanie and diaper cover. 
Size F - 3.75 mm Crochet hook for ears and nose of beanie.

My stitch gauge for a 4 inch square is as follows: 14 hdc and 10 rows

Special stitches: Sc tog. Insert hook into first stitch, draw up a loop, insert hook into next stitch, yarn over and draw through all loops on hook.

Rd 1:  Ch 4, slip stitch to first chain (or in magic ring) ch 2, 8 hdc into ring, do not slip stitch, work in continues rounds. Use stitch marker to mark beginning or end of rounds. (8 hdc)
Rd 2: 2 hdc into each stitch (16 hdc)
Rd 3: *Hdc into first st, 2 hdc into next st*. Repeat *-* for the end of round. (24 hdc)
Rd 4: *Hdc into first 2 st's, 2 hdc in next stitch*. Repeat *-* for the end of round. (32 hdc)
Rd 5: *Hdc into first 3 st's, 2 hdc in next stitch*. Repeat *-* for the end of round. (40 hdc)
Rd 6: *Hdc into first 4 st's, 2 hdc in next stitch*. Repeat *-* for the end of round. (48 hdc)
Rd 7: *Hdc into each stitch around. (48 hdc)
Rd 8 - 13 : Hdc into each stitch around. At the end of round 13, slip stitch into next stitch, change to CC. (48 hdc)
Rd 14: Ch 1, sc in each stitch around. If using textured or furry yarn finish off, for regular yarn, slip stitch in first stitch, ch 1, turn and repeat row before finishing off. Work in any loose ends.

Ears: Work 2 in White (for this part I used regular worsted weight) and 2 in Pink
Rd 1: Ch 4, sc in 2nd ch from hook and next 2 ch. Ch 1, turn (3 sc)
Rd 2: Sc in each stitch across, ch 1, turn (3 sc)
Rd 3 and 4: repeat rd 2
Rd 5: 2 sc in first stitch, sc in next st, 2 sc in last st., ch 1, turn (5 sc)
Rd 6 and 7: Sc in each stitch, ch 1, turn. (5 sc)
Rd 8: Sc together first 2 stitches, sc in next, sc tog. last 2 stitches. (3 sc)
Rd 9: Sc in each stitch across, ch 1, turn (3 sc)
Rd: 10: Sc tog. first 2 stitches, sc next, ch 1, turn (2 sc)
Rd 11: Sc tog. both remaining stitches, fasten off, leaving long tail for sewing. (1 sc)
Holding wrong sides together, whip stitch 1 white and 1 pink together. Repeat with other ear.
Attach White (I used Pipsqueak) yarn to bottom corner of ear and sc around, leaving very bottom of ear unworked. (Working through both parts of the ear.)
Hint: When working with textured and furry yarns, work with backside facing. This way your flat stitches will be in the back of the work and you will get a more textured or furrier look on the front.
Work in any loose ends and attach to beanie.
Nose: You can simply embroider your nose directly on to your beanie, or work as follows: Ch 3, 4 hdc into 3rd chain from hook, slip stitch to top of first stitch, break yarn.
Eyes: With all 6 strands of black embroidery floss, make French knot for each eye. http://www.ehow.com/how_5978_make-embroidery-french.html
Use Back stitches to embroider mouth.
http://www.purlbee.com/embroidery-tutorial/2007/2/12/backstitch.html

Diaper Cover is made using the pattern for the Don't Eat the Daisy Diaper Set. Sorry, haven't been able to figure out yet how to Hyper link a word, so here is the direct link to the pattern: http://anniespictureperfect.blogspot.com/search/label/hat%20and%20diaper%20cover

If you are using textured or furry yarn for the trim, only add one round of trim instead of two.

To make small pompom: Wrap yarn several times around 3 closed fingers, tie off center and cut open loops. Fluff and attach to the back of the diaper cover. Enjoy!
If you find any errors or have questions about this pattern, please let me know.


This pattern and photos are my originals. They are not to be posted or reproduced without my consent. You may use your finished product for any purpose. If you wish to share this pattern, please provide a link back to this Blog.

Wednesday, March 6, 2013

Dino Tales, Earflap Hat Pattern


]
This hat came about because of another unfinished project. A few months ago I started a Dino hat. The spines where crochet individually, as little cones. I hated making and attaching those tight little cones and did't see another Dino or Dragon hat in my future. Standing in line at a store last week, I noticed a little boy wearing a a cute Dragon hat. The spine was constructed in one piece. I like this idea much better. After a little experimentation, I came up with this version. It's much easier to crochet and sew to a hat, than the individual cones.
This pattern can easily be adjusted to fit any size hat. I am quite pleased with the results. The large spines are made using 6 single crochets and the small spines are made with 4 single crochets. I made two hats in different sizes. Using the first one as a guide, I adjusted the pattern by subtracting one small spine. Allowing one single crochet per row of double crochets or one single crochet for 2 rows of half double crochets, it's easy to adjust the pattern either way. By changing the size of a scale, adding a small or a large one, I can adjust in 2, 4 and 6 stitch increments.


Earflap Hat Pattern   

This hat is worked with half double crochets to fit size 18 - 24 months. If you prefer to crochet with double crochets, make sure the dimensions of your hat are approximately the same as mine, or adjust the number of chains for your spine accordingly. 

My hat measures 16 inches in diameter and is 7 inches deep. The tail of my hat measures approximately 8 inches.

I used  close to a half a skein of  Hobby Lobby's I Love this Yarn for the main color and less than 1/4 of a skein in the coordinating color. My hat is done in Neon Green and Neon orange but these colors are currently not available. I used a size I - 5.5 mm hook.
Stitch gauge for 4 inch square: 14 stitches across and 10 rows deep.
Small amounts of Polyfill to stuff the scales
Large embroidery needle to work in ends and attach scales and ears.

Stitches used: ch, sc and hdc.
Special stitches used:  Hdc tog. (To hdc tog: Yarn over, insert hook into first stitch, pull up a loop, insert hook into next stitch, pull up a loop (5 loops on hook), pull through all 5 loops on hook).

Body of the hat:

The hat is worked in continues rounds, use stitch marker to mark the end or beginning of rounds.   
Rd 1: With MC use your preferred method. I did 8 hdc in magic ring. You can also ch 4, slip stitch, chain 2 and 8 hdc into ring. Do not slip stitch, work next round continuously. (8 hdc)
Rd 2: 2 hdc into each stitch (16 hdc)
Rd 3: *Hdc into first st, 2 hdc into next st*. Repeat *-* for the end of round. (24 hdc)
Rd 4: *Hdc into first 2 st's, 2 hdc in next stitch*. Repeat *-* for the end of round. (32 hdc)
Rd 5: *Hdc into first 3 st's, 2 hdc in next stitch*. Repeat *-* for the end of round. (40 hdc)
Rd 6: *Hdc into first 4 st's, 2 hdc in next stitch*. Repeat *-* for the end of round. (48 hdc)
Rd 7: *Hdc into first 5 st's, 2 hdc in next stitch*. Repeat *-* for the end of round. (54 hdc)
My flat circle now measures 5 1/2 inches in diameter. If your work is done to the correct gauge, it should measure the same. I am now done making increase rounds and the rest of my rows are worked with 54 hdc per row. 
Rd 8 - 17: Hdc into each stitch. (54 hdc) Do not break yarn. At the end of row 17, ch 2 turn.

Earflaps:
Rd 1: Work 12 hdc into next 12 stitches, ch 2, turn (12 hdc)
Rd 2: Work hdc into each stitch, ch 2, turn (12 hdc)
Rd 3 - 4: Repeat rd 2, 
Rd 5: Hdc tog. first 2 stitches, hdc into each of the next 8, hdc tog. last 2 stitches. Ch 2, turn. (10 hdc)
Rd 6: Hdc tog. first 2 stitches, hdc into each of the next 6, hdc tog. last 2 stitches. Ch 2, turn. (8 hdc)
Rd 7: Hdc tog. first 2 stitches, hdc into each of the next 4, hdc tog. last 2 stitches. Ch 2, turn. (6 hdc)
Rd 8: Hdc tog. first 2 stitches, hdc into each of the next 2, hdc tog. last 2 stitches. Ch 2, turn. (4 hdc)
Rd 9: Hdc tog. first and last 2 stitches, break yarn. 

For second earflap. On right side of hat, skipping 12 stitches to left edge of completed earflap, attach yarn into 13th stitch. (see photo below)

Skip 12 hdc's, attach yarn into the 13th stitch.


Rd 1: Chain 2, hdc into same stitch and into next 11 stitches. (12 hdc)
Rd 2 - 9: Repeat as for first earflap. Finnish off, break yarn.

Tail:
Working on right side and back of hat (skipped 12 hdc's), skip 2 hdc's on the left edge of first earflap worked. (See photo below.)

Insert hook into the 3rd stitch.

Rd 1: Attach yarn into 3rd hdc, ch 2, hdc into same st and each of the next 7 st's. Ch 2, turn. (8 hdc)
Rd 2: Hdc into each stitch across. (8 hdc)
Rd 3 - 18: Repeat rd 2, ch 2, turn (8 hdc)
Rd 19: Hdc tog. first 2 stitches, hdc into each of the next 4, hdc tog. last 2 stitches. (6 hdc)
Rd 20: Hdc tog. first 2 stitches, hdc into each of the next 2, hdc tog. last 2 stitches. (4 hdc)
Rd 21: Hdc tog. first 2 and last 2 stitches, finish off, break yarn. (2 hdc)

Edging: Starting on the front edge, I attached yarn at the first stitch next to the right earflap. To imitate scales, I worked a large shell over the front of the hat and small shells over the rest. Including ear flaps and tail. Or  use any edging you prefer. 
Large Shell: *Sc into first stitch, skip next stitch, 5 dc's into next stitch, skip  next stitch*, repeat from *-*. 
Small Shell: *Sc into first stitch, skip next stitch, 5 hdc into next stitch, skip next stitch*, repeat *-* around. 

Scales:
Special stitch: sc tog.: Insert hook into first st, draw up a loop, insert hook into next stitch, draw up a loop, yarn over, draw through all loops on hook.

The scales are worked as one piece. (Make 2)
Rd 1: With CC (I used Neon Orange) Chain 65. Sc in 2nd ch from hook and each chain across. (64 sc)
Rd 2: On this round each scale is worked individually, in rows.
         The large scale is worked as follows: sc into each of the next 6 st's. Ch 1, turn (6 sc)
        * Work 6 sc into each st. ch 1, turn (6 sc)
         sc tog. first 2 stitches, sc into each of the next 2, sc tog. last 2 stitches, ch 1, turn (4 sc)
         sc tog. first 2 and last 2 stitches, ch 1 turn (2 sc)
         sc in each of the next 2 stitches, do not break yarn.
         Make 3 sc down the side of the scale, make a 2nd sc into the 6th sc of the base row*  (first 6 sc row of the scale just made)
work a sc into next 6 hdc's and repeat from *-* to complete next scale. Repeat steps until you have a total of 8 large scales. 

Work sc's down the side of the scale just made

At this point you should have a total of 16 hdc's unworked. 
To make small scales: 1 sc in each of the next 4 stitches. ch 1, turn (4 sc)
                                  Sc tog. first 2 and last 2 stitches, ch 1, turn  (2 sc)
                                  Sc tog. remaining 2 stitches, do not break yarn,
                                  make 2 sc down side of scale just completed. Sc again into first sc of  base row for scale. Repeat small scale 3 more times. Finish off, break yarn.

This is how your finished scales should look.
Matching up small and large scales, whip stitch ends and scales of both pieces together, leaving long bottom edge of scales unworked. Fill each scale with small amounts of Polyfill. Slip stitch opening at bottom edge and attach to center of hat and tail.

After whip stitching both pieces of the spine together, stuff lightly and whip stitch  bottom
edge closed.

To find the center line, fold hat in half, matching earflaps. Pin or bast in place. Whip stitch spine to hat.

Ears: 
Use a smaller hook to work ears. I used a size F-3.75 mm hook. It produces a stiffer fabric and eliminates unsightly holes, left by a bigger hook. Work 2 pieces in MC and 2 pieces in CC of your choice. 

Rd 1: Ch 7, sc in 2nd ch from hook and each st around. Ch 1, turn. (6 sc)
Rd 2: Sc into first and each stitch around, ch 1, turn. (6 sc)
Rd 3 - 7: repeat round 2
Rd 8: Sc tog. first 2 stitches, sc in each of next 2, sc tog. last 2 stitches, ch 1, turn. (4 sc)
Rd 9: Sc tog. first 2 stitches and last 2 stitches, ch 1, turn. (2 sc)
Rd 10: Sc tog. remaining 2 stitches. Fasten off, leaving long tail for sewing.

Holding wrong sides together, whip stitch 1 MC and one CC together. When attaching folded ear, I found it easier for me to fold the ear and stitch together before attaching it to the hat.

For folded ears, fold in half and run a few stitches through the bottom edge. 

Attach ears, work in any remaining loose ends. Have fun accessorizing you hat. As you can see, I had a a lot of fun with mine.  

 Let your imagination go wild. This is the final, Deluxe version of  the first one I made. 

This pattern and photos are my originals. They are not to be posted or reproduced without my consent. You may use your finished product for any purpose. If you wish to share this pattern, please provide a link back to this Blog.


Thursday, February 28, 2013

Don't Eat the Daisies Newborn Diaper Cover and Shell Beanie

Being snowed in for a week,  I had a lot of extra time to reduce some of my yarn stash. I have a lot of partial skeins and since baby items do not use a lot of yarn, I started to work on a baby hat. Out of a half a skein of of I love this Yarn in Periwinkle, I was able to make a hat, a diaper cover and cute slippers to complete the set. I love this color and it pares well with white. I added the Ladybug buttons as an afterthought. The results are adorable. If you like this pattern please leave a comment and join this Blog,  to keep  updated on any new releases.


The hat is worked with a simple large shell and V-stitch pattern. The diaper cover and slippers are half double crochets. They are all easy to make projects and work up very fast. 


Beanie Pattern

Size - Newborn 14 inch diameter and 5 1/2 inches deep. 

Supplies: Worsted weight yarn (I used Hobby Lobby's I love this yarn in Periwinkle and White). Small amount of yellow for center of flowers.
Size J - 5.50 mm Crochet hook

My stitch gauge for a 4 inch square is as follows: 14 hdc and 10 rows

Special stitch pattern: Beginning Large Shell: Chain 3, 2 dc, into same stitch. 
                                 Large Shell - 5 double crochet into same stitch
                                 Beginning V-stitch: Chain 4 (1 dc + ch 1 space) 1 dc in first stitch
                                 V - stitch - 1 dc, ch 1, 1 dc in same stitch

Chain 3 counts as 1st dc in each round.
With Main color (Periwinkle)
Rd 1: Ch 2, work 5 sc in 2nd ch from hook. Slip stitch to top of 1st sc. (6 sc)
Rd 2: Ch 1, 2 sc in each st across. Slip stitch to top of 1st sc.  (12 sc)
Rd 3: Ch 1, sc in same st as chain, 2 sc in next st. 1 sc in next st, 2 sc in next st. Repeat till end of rd. (18 sc)
Rd 4: Chain 3, 1 dc in same st. 1 dc in next st. 2 dc in next st, 1 dc in next st. Repeat for end of round. Slip stitch to top of chain 3. (27 dc)
Rd 5: Slip stitch into space between first 2 dc. work Beginning V-Stitch (ch 4, 1 dc). Skip next dc. Work 2 dc in space of single dc of previous rd. Skip next dc. Work V-stitch (1 dc, ch 1, 1 dc) into space between next 2 dc of previous rd. Skip next dc, 2 dc into single dc of previous rd. continue working V-stitch and 2 dc for end of rd. Slip stitch to 3rd ch of beginning ch 4.  (9 V-stitches, 18 dc)
Rd 6: Slip stitch into ch space of first V-stitch, Work Beginning Large Shell (ch 3, 2 dc) into ch 1 space. Sc in space between next 2 dc group. *Work Large Shell (5 dc) into next chain 1 space, sc into next space between 2 dc group*. Repeat from *-*. 2 dc in space of  Beginning shell. Slip stitch to top of ch 3. (9 Shells, 9 sc)
Rd 7: Ch 1, sc in same stitch. ch 1, *Work V-stitch on top of next sc, ch 1, sc in center of Large Shell (3rd dc), ch 1 *, repeat from *-* till end of rd. Slip stitch to top of 1st sc. (9 V-stitches, 9 sc, 18 ch 1 spaces)
Rd 8: Work Beginning Shell, sc in center of next V-stitch, shell, sc in center of next V-stitch till end of rd. 2 dc in same space as Beginning Shell. Slip stitch to top of beginning chain 3. (9 Shells, 9 sc)
Rd 9 - 12 repeat rounds 7-8 2 times. 
Rd 13: change to CC (white). Ch 1, sc into same stitch and in each stitch around. Slip stitch to top of 1st sc. (54 sc)
Rd 14: repeat rd. 13, break yarn. (attach Large Loop Flower)

I am still working out additional sizing. I did one more hat using Vanna's Baby (slightly finer yarn, you might need to reduce size of hook slightly). I added 2 additional stitches to rd. 3 (20 sc) to get one additional shell repeat and 2 added 2 rows. This increased my dimensions to 16 1/2 inch diameter and 7 inches deep. This should fit size 18 - 24 months. Size can also be reduced, by eliminating all if the chain spaces between the sc and V- stitches.  Often a change in hook size will change the dimensions, to fit a slightly smaller or larger head. 

Diaper Cover 

Size - Newborn - 3 months. 
Worsted weight (4 medium) ( I used Hobby Lobby's I love this Yarn in Periwinkle and white for trim.) Small amount for yellow (center of flower). 
Size J - 5.50 mm crochet hook
Button 

Special Stitches: 2 hdc together. Yarn over, insert hook into stitch, yo pull up a loop, insert hook into next stitch, yarn over and pull a loop through (5 loops on hook), yarn over and pull through all the loops on the hook. 
Rd 1: With Main Color, Chain 49, sc in 2nd chain from hook and in each stitch around. (48 sc) turn.
Rd 2: Ch 3, dc in each stitch around (48 dc) turn
Rd 3: Ch 1, sc in same stitch and each stitch around (48 sc) turn
Rd 4: Slip stitch into next 12 stitches, ch 2, hdc same stitch and in next 23 stitches (leaving rest unworked). (24 hdc), turn
Rd 5, Hdc in each stitch across (24 hdc)
Rd 6, 7, 8  Repeat rd 5
Rd 9: Chain 2, hdc together next 2 stitches, hdc next 20, hdc together last 2 (22 hdc)
Rd 10: Ch 2 hdc in each stitch (22 hdc), turn
Rd 11: Ch 2, hdc next 2 st together, hdc next 18, hdc together last 2 stitches. (20 hdc), turn
Rd 12: Ch 2, hdc in each stitch across. (20 hdc), turn.
Rd 13: Ch 2, hdc first 2 together, hdc in next 16 stitches, hdc last 2 together. (18 hdc), turn
Rd 14: Ch 2, hdc first 2 together, hdc in next 14 stitches, hdc together last 2 stitches (16 hdc), turn.
Rd 15: Ch 2, hdc first 2 together, hdc in next 12 stitches, hdc together last 2 stitches (14 hdc), turn
Rd 16- 23: Ch 2, hdc in each stitch around (14 hdc)
Rd 24: Change to CC, chain 1 sc around diaper cover putting 2 sc in corners of bottom edge and waistband. Slip stitch to top of 1st sc. Do not turn.
Rd 25: Chain 1, sc in each stitch around. Break yarn, weave in ends. 
Rd 26: repeat rd 25
Attach small flower.


Baby Slippers

Size: Newborn
Worsted Weight (4 medium). MC (I use Hobby Lobby's I love this yarn)
Size G hook - 4 mm

Special stitches: 2 hdc tog. Yarn over, insert hook into stitch,yo and pull up a loop, insert hook into next stitch, yarn over and pull a loop through (5 loops on hook), yarn over and pull through all the loops on the hook.


Crochet In the Front or Back Loops of a Stitch, Stitch Anatomy
Stitching in Back Loop only

                                                     
This is worked in the round, do not turn.

Rd 1: With CC (white) chain 10, hdc in 3rd chain from hook and in next 6 chains, 6 hdc into last chain. Working on opposite side of chain, 7 hdc evenly into loops, 5 hdc into last stitch, slip stitch to beginning hdc. (25 hdc)
Rd 2: Ch 1, sc in next 7 stitches, work 2 sc into next 5 stitches, sc in next 7 stitches, 2 sc in each of the next 5 stitches, slip stitch to top of 1st sc. (34 sc)
Rd 3: Ch 1, sc into next 7 stitches, (2 sc in next, 1 sc in next) repeat 5 times, sc in next 7 stitches, (2 sc in next, 1 sc in next) 5 times. (44 sc)
Rd 4: Change to MC. Ch 2, in front loops only  hdc in each stitch across, slip stitch to top of ch 2. (44 hdc)
Rd 5: Ch 2, hdc in each of the next 7 stitches, hdc together 7 times (total of 14 st), hdc in next 23 st, slip stitch to top of ch 2. (37 hdc)
Rd 6: Ch 2, hdc in each of the next 5 stitches, hdc together 6 times (total of 12 st), hdc in next 20 st, slip stitch to top of ch 2. (31 hdc)
Rd 7: Change to CC, ch 1, sc in each stitch across. (31 sc). Fasten off, weave in ends. Attach a small flower to top of each slipper.   


Large 6 Petal Flower

With Yellow, ch 4, slip stitch to first chain.
Rd 1: Ch 3 (counts as first dc), 11 dc into ring. (12 dc)
Rd 2: Change to MC (white). Ch 1, sc in same st, *ch 3, skip next dc, sc in next stitch*, repeat from *-*. Slip stitch to first sc. *(6 ch 3 spaces)
Rd 3: Slip stitch in first chain space, ch 1 (1 sc, 1 hdc, 3 dc, 1 hdc, 1 sc) in each chain space around. Slip stitch to first sc. (6 petals made)
Rd 4: Ch 2, Working behind petals,sc around post of next petal (insert hook from back around post). ch 8, slip stitch into sc at the beginning of ch just made, *ch 2, sc around post of next pedal, ch 8, slip stitch into sc at the beginning of chain*. *-* Repeat around all petals, slip stitch into first sc. (6 ch 2 and 6 ch 8 loops)
Rd 5: Slip stitch into first ch 8 space, sc, hdc, 6 dc, ch 1, 6 dc, hdc, sc in first chain 8 space (large petal made). To anchor and close the petal, slip stitch into sc of the previous rd, ( first sc below beginning of ch 8 space.(Sorry, was going to have picture but camera is out of batteries). Slip stitch into next chain 8 space and repeat as for previous petal. Repeat 4 more times. Slip stitch into first sc. Fasten off, leaving long tail to attach flower. (6 large petals)


Small 5 Petal Flower

Make 3, (2 for slippers and 1 for diaper cover)
Rd 1: With yellow, ch 2, 10 sc in 2nd ch from hook, slip stitch to top.
Rd 2: With MC (white), ch 1, * (1 sc, 2 hdc) in next stitch, (1 dc, 2 hdc, 1 sc) in next stitch* (first small petal made). Repeat from *-* for remainder of rd. Slip stitch to beg. chain 1. Fasten off, leaving long tail to attach flower. (5 small petals)

This pattern has not been tested. If you find any errors please let me know, so I can make any corrections necessary.

Another set I made using the pattern. This time I opted for butterflies.


This Pattern is my original design and not to be posted or reproduced on any website, or printed version. You may use your finished project for any purpose. If you wish to share this pattern, please only provide a link back to the pattern.

Added the PDF Version, hope this makes it easier to save this pattern to your computer.

Tuesday, February 19, 2013

Spring Flower Granny Square Shoulder Bag

Part 2: Making the Bag


Sorry, it took me a bit longer than anticipated  to post the pattern for the bag. I've been a bit under the weather and a little slow in getting things done. This is a cute bag to take to the beach or the pool. It consists of 16 Granny Squares with center flower (see previous post). For my bag I used Hobby Lobby's I love this yarn in several colors. I used 4 different colors for the flowers in the square and the coordinating Ombre (Seaside) to compliment my colors. The white was worked with Red Heart Super Soft. I used a size H hook. Gauge is not important. This is a great stash bust project.
My finished bag measured: 16 inches deep (from top of peak to bottom of bag) and 13 1/2 inches wide.      

The most difficult part is the assembly of the squares. I took a lot of pictures of this process to make it as easy as possible. 
Work 16 squares, weave in loose ends.

Assembly:
This bag is assembled in a pin wheel fashion. First, sew 4 of your squares together to create the bottom center square. Lay out your pattern as pictured below.

Sew the center 4 pieces together. When laying out your pattern, keep in mind that the 2nd square in a row will be folded and attached to the empty space of your center square. The center square will the the folded bottom of the bag when it is fully assembled. This is helpful to remember, when laying out different colored squares. 
Hint: Before sewing the pieces together I recommend pinning or basting the squares with large running stitches of a contrasting color. It is easier to pull one unsecured piece of string than it is to take apart securely stitched squares.

Test the layout of your squares before sewing them together. If you are satisfied with your color layout. Securely attach the squares. I do a flat seem by holding squares right side together and whip stitch only the outside loops of the sc's on both squares. See: http://www.patonsyarns.com/images/glossary/FlatSeamCrochet.jpg 
You can also crochet a flat seam using this tutorial: http://www.crochettoday.com/how-to/how-seam-together-crochet

Once you have all of the squares secured into the pinwheel, it is time to attach the rows. Start by folding one row onto the next in this manner. (see picture above). The square in the center will be folded in half. Remember, the finished bag will have peaks and is not a rectangle. The extra square in the row will create one of the peaks. Again, I  recommend basting all of the rows before sewing. 


This is how your bag should look with 3 of the seems attached. Remember, when assembling the rows, the 4th square of the row, will become the 3rd square in the next row. 

Wrong side of bag with all of the squares fully attached. 


Once all of the squares a securely sewn together, remove all basting stitches and dew in any loose ends. Now it is time to attach the handles and finish the top of the bag. 

Handles and top of bag: Attach yarn to center single crochet of any peak. (see photo below).


Chain 55 and attach to center single crochet in next peak. Break yarn. Repeat for other side (handle). Do not break yarn. At this point I do need to offer an apology. I am unable to give any stitch counts from this point on. My notes on this were written on the back of a pattern instead of my notebook. I cleaned off my desk and sent a bunch of papers through the shredder. Since the top of the bag is very easy to do and I have photos for the instructions, I didn't have the heart to undo all of my hard work and re-write the pattern for this. 

The top of the bag and the handles are worked in continues rounds. Once you attach the chain 55 to the top of the last peak, continue with single crochets down the square until you reach the valley ( were 3 squares meet. Single crochet together the last stitch of the square you are working on and the first stitch of the next square coming back up. (See photo below.)


Single crochet all stitches. Single crochet in all 55 chain stitches of the handle, catching in one loop only. Repeat this pattern until the end of the row. (The section of squares between each handle will remain unworked for now.) 

Rd 2: Repeat row 1, as before, sc together the last and first stitches of the squares in the valley. In this round you will also sc together the last stitch of the peak of the square and first stitch of the handle. Single crochet all the way around (over both handles and all of the squares worked in the previous round.)

Rd 3: Slip stitch through all stitches of the previous round, break yarn. 


Previously unworked section and other side of handles:

Rd 1: Attach yarn to unworked section at the top of peak where handle meets the square. Repeat as before. Single crochet around all unworked stitches, Sc together in valleys of bag and sc all stitches of handle (working in both loops of other side of starting chains).

Rd 2: Repeat round 1, sc around all stitches.

Rd: 3: Slip stitch into all sc of previous round. Repeat all steps for other unworked section and handle. Break yarn and finish all loose ends. 

Part 3 in this series is the matching Spring hat using the flowers and a modified version of the square. Hoping to post this pattern before the end of this week. 


Wednesday, February 13, 2013

Easy Granny Square with Center Flower

Part 1: The flower and square


This is a simple granny square measures about 5 X 5 inches. The center flower is about 2 inches in diameter. used a medium worsted weight yarn and a H hook. The flower consists of single crochet center and 8 popcorn stitches making up the pedals. I wanted a square small enough to be used in several projects, with the flower being the center piece. After making a large number a small flowers, I chose this simple popcorn flower because I love the way in stands above the square and adds a lot of dimension to the finished product. By itself it is small and plain but using it in conjunction with the square, it really pops. 

Special Stitches
Beginning popcorn: Chain 3, wk 4 dc into same stitch. Drop the loop from hook, insert hook from front to back into top of chain 3. Pick up the dropped loop. Yarn over and draw through all loops on hook. 
Popcorn: 5 dc into same space. Drop loop, insert hook from front to back into top of first dc. Pick up dropped loop, yarn over and draw through all loops on hook.
Helpful hint. Since there are a lot of color changes, it is helpful to work over as many loose ends as possible to cut down on the number of ends that need to be worked in later. 
Insert hook from front to back into first  stitch


The Flower:
For the center I chose yellow and worked the pedals in a different color.
Rd 1: (center) Like any project worked in the round, there are several ways to work this round. Choose the one you prefer. Work either 8 sc into a magic loop, slip stitch into first sc. 
2nd method: Chain 4 slip stitch into first chain. Chain 1 and sc 8 into ring. Slip stitch  to top of first sc.                           
3rd method: Chain 2, work 8 sc into 2nd chain from hook, slip stitch to first sc. Fasten off or change color for pedal  round. 
Finished Center

Rd 2: (pedals) I prefer to fasten off and start joining the new color with a sc to any sc of the first rd. This gives this flower a neater finish. (You can also with alternating color chain 1, sc into first sc.) Chain 3, sc into next stitch, chain 3, sc into next stitch. Repeat until you have 8 chain 3 loops. Slip stitch into first sc and into first chain 3 loop. 8 chain 3 loops.

Rd 3: Work beginning popcorn (see top), chain 1, into next chain work popcorn (see top), chain 1. work popcorn, ch 1 into each remaining chain. Slip stitch to the top of chain 3 of beginning pedal. Fasten off. 8 pedals made.

Back of pedals


Finished Flower


Working the square:
Rd 1: I used mint green for this round. With sc attach yarn to any chain one space between pedals. Chain 3, sc into chain 1 space of next pedal. Repeat for a total of 8 chain 3 loops. Slip stitch into first loop made. 8 chain 3 loops total.


Rd 2: Chain 3, 2 dc into same space. Chain 1, in next chain 3 loop work corner (triple crochet, chain 1, triple crochet, chain 1, triple crochet), chain 1. In next chain 3 loop work 3 dc cluster, chain 1. repeat corners, chain 1 and clusters,chain 1 (ending with corner, chain 1) Slip stitch into top of beginning chain 3 space. Fasten off. 4 leaf corners and 4 clusters made. 

Rd 3: With color of your choice (I used white) attach with slip stitch to any chain 1 space between corner leaf and first cluster of previous rd. Chain 3, 2 dc into same space. (Beginning cluster made)


Work cluster into next ch 1 space. (Skip next triple crochet and chain 1 space). Into center triple crochet of previous round, work corner (3 dc, chain 2, 3 dc). Into next chain 1 space between leaf and cluster of previous rd (skip next sc and triple crochet), work 3 dc cluster, work cluster into next chain space, work corner into next center triple crochet. Repeat pattern for end of round. Slip stitch to top of beginning chain 3. 8 clusters and 4 corners made.

Rd 4: Slip stitch into next 2 dc and into next space. Work as for previous rd. Clusters into spaces between clusters and corners into ch 2 corner spaces. Slip stitch to top of beginning chain 3. 12 clusters and 4 corners made. Fasten off.  (If you would like to make a bigger square continue rounds in this manner until square is desired size.)

Rd: 5 Using contrasting color (I used an ombre yarn matching the colors of my flowers) attach with sc to any corner space,(leaving a long tail to stitch squares together). sc in corner and in each stitch across, with 3 sc in each corner space. In last corner space work 1 sc, slip stitch to top of first sc. Fasten off, leaving long tail for attaching squares. 

Like any granny square, this square can be used for a lot of projects. I think this would make a very pretty afghan. I have already worked it into a cute summer hat and I am currently working on making a matching Tote or Shoulder bag. Will post the patterns very soon. I am in the process of assembling the Tote. Need to rework the hat. When I did my original calculations, I forgot to take the dept of the circle into account. This hat comes down to my eyes. Live and learn! 

Omitted last 2 rounds of the square. This hat has a total of 6 squares. 

Close up of the flower in the hat. 


Since these are my original patterns, please don't claim as your own. You have my permission to post the patterns on your Blog or Website as long as you link back to my Blog, giving me credit as the designer and original source. 


Thursday, February 7, 2013

Lacy Crochet Bow with Center Flower


Can you tell I love bows? Not only are bows very pretty, they are also a very versatile accessory. They can be attached to brooch pins, hair clips or sewn on, to add instant flair to any project. Someone posted a photo  of a bow on one of the crochet Facebook pages I like. Other than a few photos and Chinese symbols, there were no directions on how to make it. I liked the lacy look of this bow and after studying the photos, I had a pretty good idea of how it was made. 

This is a very easy pattern. The body of the bow consists of chain spaces and the flower is simple. One layer with 6 pedals. I used Caron Simply Soft and a size H hook. The Chinese version was made with 2 strands of fine crochet thread. My finished bow measures 5 inches by 2 inches.  I haven't tried making this bow with bulkier worsted weight yarn. I like the dainty look of the finer yarn because it gives it more of a lacy look. 

This bow is worked in the round.
Chain 60, slip stitch to the first chain, being careful not to twist the chain. 
Rd 1: Chain 3, skip 2 chains, slip stitch into 3rd chain. Repeat till the end of round, slip stitch in to first stitch.

Rd 2: I worked the rest of this bow in one continues round, using the starting tail as my guide to the end of my rounds. You can also mark the first loop with a piece of yarn. Chain 3, slip stitch into first loop. Chain 3, slip stitch into next loop. Continue in this manner until your bow is the with you need. Mine was 2 inches without the border. Fasten off.

Border: With contrasting color, attach yarn with single crochet to any chain 3 space of the last round. If you don't now how to attach with single crochet, attach yarn into center of chain, chain 1, sc in same space.


Chain 3, double crochet into the the sc you just made.


Chain 3, single crochet into next ch 3 space. Double crochet into sc just made, chain 3, sc into next space. Continue to the end of round, slip stitch into first sc. Fasten off.

Now working on opposite side of bow (60 starting chain). Attach yarn with sc to any slip stitch of the first row. Do not crochet into the spaces. Work the same as for other side only this time you crochet into the slip stitches of the first round. Fasten off, work in ends.

I like to tri- fold my bows and stitch the center so it will hold it's shape. Fold bow in half and fold top and bottom edge of the bow to the fold in the center.


To make the center piece of the bow: Chain 16, sc in 2nd chain from hook and into each stitch to end of row. Chain 1, turn. Sc in each stitch across. Fasten off, leaving a longer tail. Attach enter to bow, slip stitch closed in center of back. 


Flower: Rd 1, for center of flower, chain 4 and slip stitch to first chain or into magic ring work 16 dc. First chain 3 + 15 dc. Slip stitch to top of chain 3. Fasten off.

Rd 2: With contrasting color attach with sc to any dc of previous round. Chain 4, skip 2 dc, sc into next, chain 4 skip next 2 dc, sc into next. Continue till end of round, slip stitch to first sc. 6 chain 4 loops. 


Rd 3: Chain 1, sc into first loop, 1 hdc, 2 dc, 1 triple crochet, 2 dc, 1 hdc, 1 sc into same loop. (first pedal made.), sc into next loop and repeat as for 1st loop. Make 4 more pedals, slip stitch to first sc. Fasten off. 

Work in ends, leaving one tail for attaching flower to bow. Center flower to center of bow and sew in place. 


The size of this bow can be easily changed by adding more sc to round 1 in multiples of 3 and adding more rounds to the bow. 

Wednesday, February 6, 2013

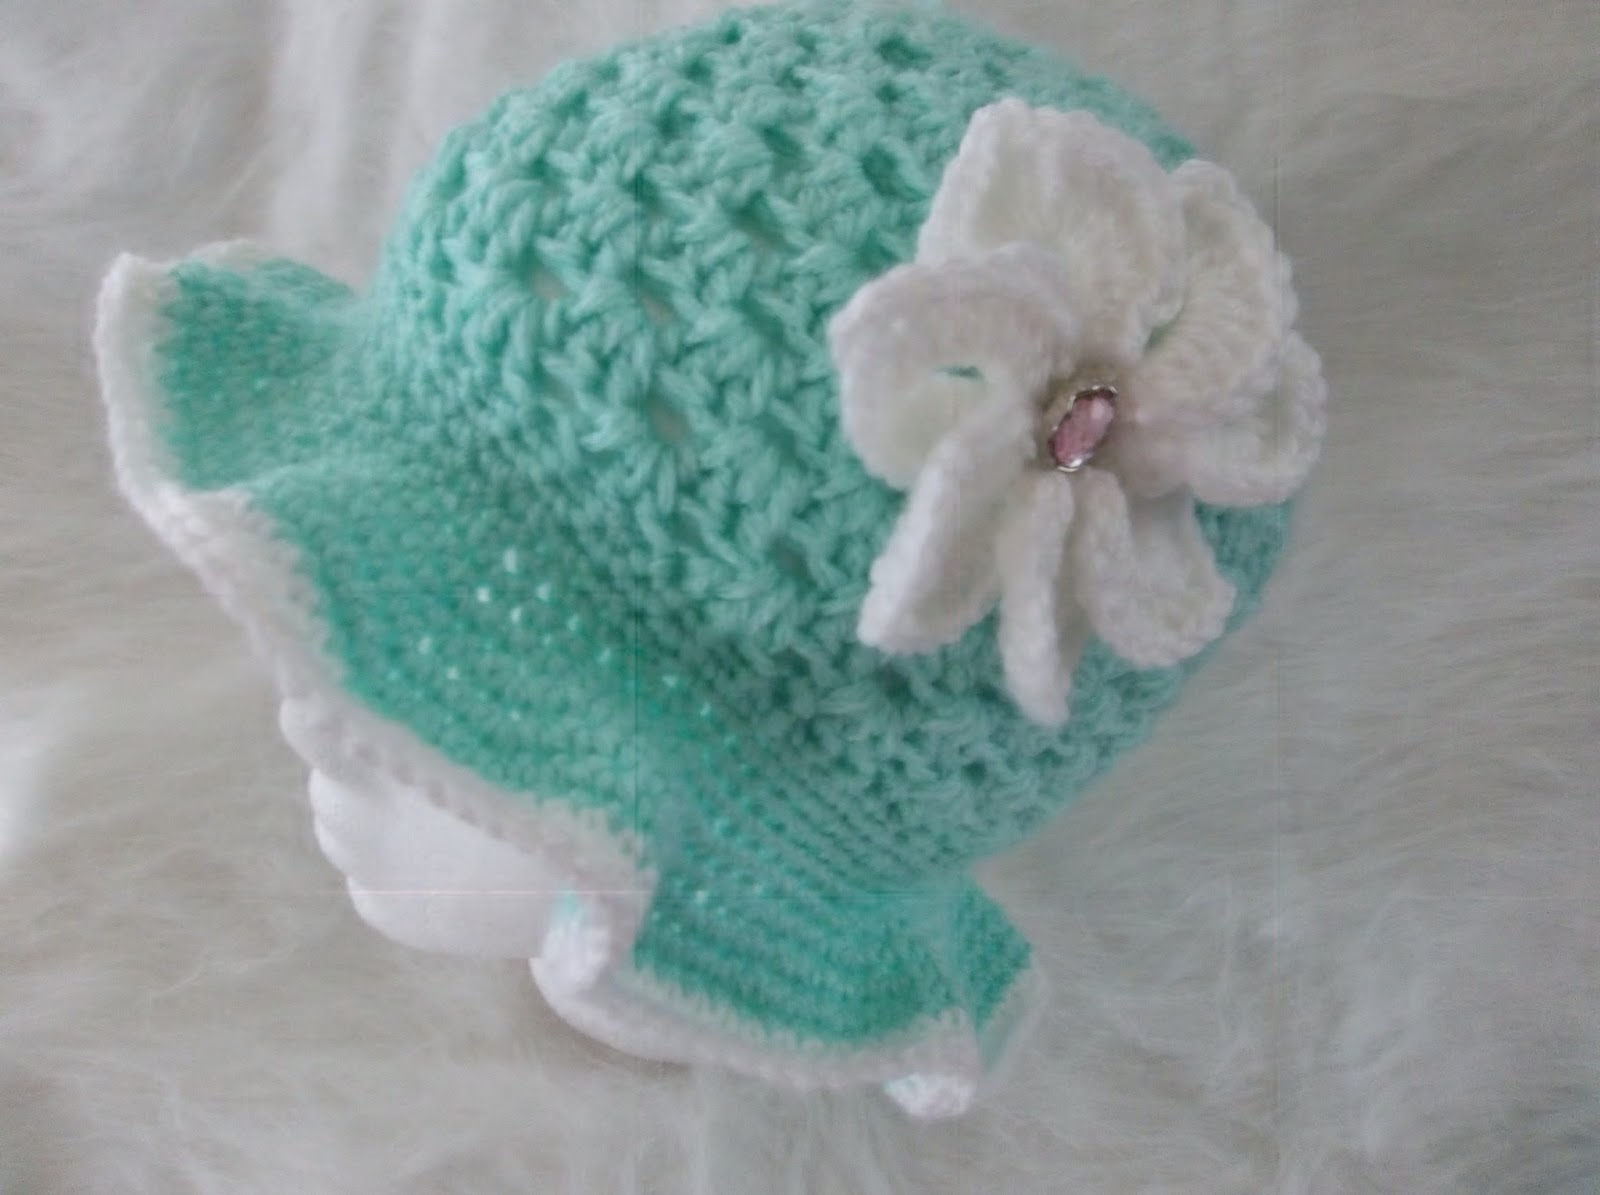
Easy Crochet Spring/Easter Hats - Free Pattern

According to the Groundhog, winter is almost over. I for one, am ready for spring. When I was organizing my stash of yarn, I found a few skeins in pretty pastel colors. Just what I needed to deal with the winter blahs. Since I had just purchased a few more skeins of white, I decided to make some pretty hats for spring.
Less than a couple of hours later, the first one was finished.


These hats are very easy to make. If you know how to work a simple Granny Square and you can single crochet, making this hat is a breeze. How do you turn a square into a round? All you need to do is to offset your corners. I work my corners into the space right after the last corner of the previous rows. This is only done on increase rounds. Once you have the desired size of your circle, the body of the hat is worked, without any corners. 

Since the body of this hat is worked in double crochets witch are taller stitches, you may need to experiment with different sizes of you hooks or using thinner or thicker yarns to get the size you need. I used Caron One Pound Baby and a size I hook. It is a worsted weight yarn. Since I crochet fairly tight, I usually go up one size in hooks, than is recommended for the yarn. If you crochet loose, you may want to use a slightly smaller hook.

If you like your brim to have a more ruffled look, simply increase the number of stitches in the beginning of the brim. To keep it flat, make fewer increases and work more single crochet rounds, without adding any extra stitches between your increase rounds.  Experiment and in no time you can design your own hats without having to use a pattern. 

The size of hat I wrote the pattern for, should fit a teen/small woman. It took 6 increase rounds. To work this for a toddler, you would only need 5 increase rounds. For teens and adults, add 1 or to increase or corner rounds to get the size you need. 


Body of the hat

With Magic Circle or chain 5 slip stitch to first chain to form a circle.
Rd 1: Chain 3, 2 dc, ch 1, 3 dc - first cluster made, (ch 1, 3 dc, ch 1) repeat 3 more times. Slip stitch to the top of ch 3. 12 dc and 4 ch spaces.

Rd 2: Slip stitch over next 2 dc and into first chain 1 space. ch 3, 2 dc, ch 1, 3 dc (first corner made). 3 dc, ch 1, 3 dc in next 3 ch spaces. Slip stitch in top of beginning ch 3. 24 dc and 4 ch spaces.

Rd 3: Slip stitch next 2 dc and into next ch space. Chain 2, 2 dc in ch space, * in space before next 3 dc group work corner (3 dc, ch 1, 3 dc), in next space 3 dc*, repeat *-* 3 times, slip stitch to top of chain. 36 dc and 4 chain 1 spaces

Rd 4: Slip stitch into first space, ch 2. 2 dc into first space, 3 dc in next space (corner space of previous rd.), 3 dc, chain 1, 3 dc in next space. 2 dc in each of the next 2 spaces, work corner into next space. Repeat till end of rd. slip stitch. 48 dc and 4 chain 1 spaces.

Rd:5 slip stitch into first space. Ch 2, 2 dc, ch 1, 2 dc in same space, work 3 dc in next space, 3 dc in next space, 3 dc in next space, 3 dc, ch 1, 3 dc in next space. Repeat to end of rd. 60 dc 4 chain spaces 


Rd 6: slip stitch into first space, ch 2, 2 dc, ch 1, 2 dc in same space. If you are still increasing your circle, work pattern as before. 3 dc groups in spaces and corner (3 dc, ch 1, 3 dc) in spaces following corner of the previous round. Once desired circle diameter is reached, work rounds with groups of 3 dc only. No chain spaces between groups. 

To get a child sized hat I had to do 5 increase rounds and my flat circle measured 6 inches. For size teen or small woman I needed to do 6 increase rounds. If you are having a hard time getting the circle measurement you need, go up or down a size in hooks, or skip 2 corners on the last increase rd. Working the pattern -make corner, skip next corner, make corner, skip last corner. This way you are only gaining 6 stitches instead of 12. 

For Teen/Small woman I needed to do 16 rounds total. Since I am adding a large brim the measurement of my hat was 7 inches deep. Shorter than I would have done for a beanie. 

Brim: I worked 6 increase rounds for a total of 72 stitches for the body of the hat. The brim is worked in single crochets and increases throughout the rounds of the brim. The pattern I use is to gradually increase the number of stitches in my rounds.

Rd: 1 single crochet in each stitch around. Mark last stitch since you are now working in continues rounds. 

Rd 2: Sc first 8, 2 sc in next stitch, repeat through end of rd. 80 sc

Rd 3: Sc first 7, 2 sc in next stitch, sc next 8, 2 sc in next, sc next 8, 2 sc in next, repeat increasing every 9th stitch) till end of rd. 89 sc.

Rd 4: Sc first 8, 2 sc in next, sc in next 7, 2 sc in next, sc in next 7, repeat increasing every 8th stitch, till end of rd. 100 sc

Rd 5: sc in every stitch 100 sc

Rd 6: sc first 8, 2 sc in next, sc in next 6, 2 sc in next, sc in next 6 sc, 2 sc in next. repeat increase every 7th sc, in last repeat you should have 8 stitches work increase in last. 114 sc

Rd 7: increase every 6th stitch 133 sc 

Rd 8: increase every 6th stitch, last repeat work repeat into last (7th) sc. 155 sc

Rd 9: sc in every stitch across 155 sc

Rd: 10: work increase in every 5th stitch 186 sc 

Rd: 11: work increase every 5th stitch last increase 6th stitch 223 sc

Rd 12: work increase every 4th stitch, last increase in 3rd 278 sc.

Rd: 13 sc in every stitch  278 sc

Rd: 14: work increase every 3rd stitch, last increase in 2nd stitch 370 sc

Rd: 15 and 16, sc in every stitch.

Add border of your choice. I like using a simple scallop border for my hats. The pattern is very simple.  Single crochet into first stitch, Chain 2, double crochet into same stitch as single crochet, skip 2 stitches, single crochet into 3rd stitch, chain 2 double crochet into single crochet, repeat until end of rd. slip stitch into first double crochet. 

If you used fewer or more increase rounds on the body of the hat, the pattern for increasing rounds in your brim is much the same. The sc makes for a dense and stiff brim. Work your increases as close as possible to the increases of the previous rounds. By keeping the increases close together, it creates a wave. If you like a more ruffled look, start by increasing rd 2 every 3rd sc instead of every 9th. Work sc rounds for most of the rest of the brim. If you gain or loose a stitch in any rd of this brim, it's no big deal. No need to find the mistake and re-do. I don't use a pattern, I simply work by feel. This is just to give you an idea of how to do it. 

Flowers: Pattern for flower in first photo I found at: http://bonitapatterns.tumblr.com/post/22424919278/here-goes-a-free-pattern-for-a-croco-flower-its
Flower for last (pink hat) Free Irish Rose pattern http://www.maggiescrochet.com/free-patterns-c-33.html?zenid=8df875fcc51ad47258b6540e47134139
Flower for Peach hat is a simple 3 layered flower. Pattern is easy to find, I crochet it without a pattern.
Be creative, have fun. Decorate your hat with your favorite flower or accessory. If you have any problems working this pattern or find any mistakes, please let me know. I will be glad to help you along as much as I can. 

 Please don't copy and redistribute this pattern or my photos as your own.